Welcome to this step-by-step guide on creating a VMAF (Video Multi-Method Assessment Fusion) Calculator. In this blog, we will walk you through the process of setting up a VMAF calculator, covering everything from building a user-friendly front-end interface using PyQt to implementing the back-end logic with Python and FFmpeg for video analysis. By the end, you’ll have a complete understanding of how to integrate these components and how VMAF can be used for video quality assessment.
What is VMAF?
VMAF (Video Multi-Method Assessment Fusion) is a video quality metric developed by Netflix to provide a more reliable method of measuring perceived video quality. Traditional metrics like PSNR (Peak Signal-to-Noise Ratio) and SSIM (Structural Similarity Index) offer a mathematical way to compare videos, but they often fail to correlate with how humans perceive quality. VMAF aims to bridge this gap by combining multiple quality metrics and machine learning models to provide a score that better aligns with human perception.
VMAF takes a reference video (typically high-quality) and a distorted video (often compressed or lower-quality) and analyzes the differences. It produces a score that represents the perceived quality of the distorted video. The higher the score, the closer the perceived quality is to the reference video.
Why Use VMAF?
Accuracy: It's designed to mimic human visual perception, providing a more accurate quality assessment.
Industry Standard: It has become a go-to metric for many video streaming platforms, ensuring that the end-user experience remains optimal.
Open Source: Netflix has open-sourced VMAF, allowing developers and researchers to integrate it into their video processing workflows.
Project Overview: Building a VMAF Calculator
In this project, we will create a simple VMAF calculator with the following components:
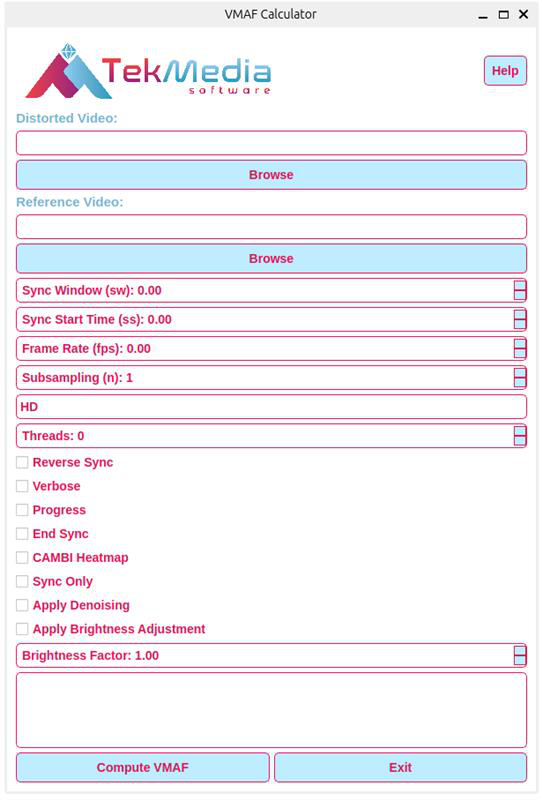
Front-End Interface using PyQt: This part will involve building a graphical user interface (GUI) using PyQt5, where users can select the reference and distorted video files. The interface will allow users to initiate the VMAF calculation and display the results.
Backend Computation using Python and FFmpeg: The core computation is performed using Python. FFmpeg is used for video preprocessing, such as resizing videos to the same dimensions before calculating VMAF. We will use a Python wrapper for FFmpeg to simplify video processing and integrate it with VMAF computation.
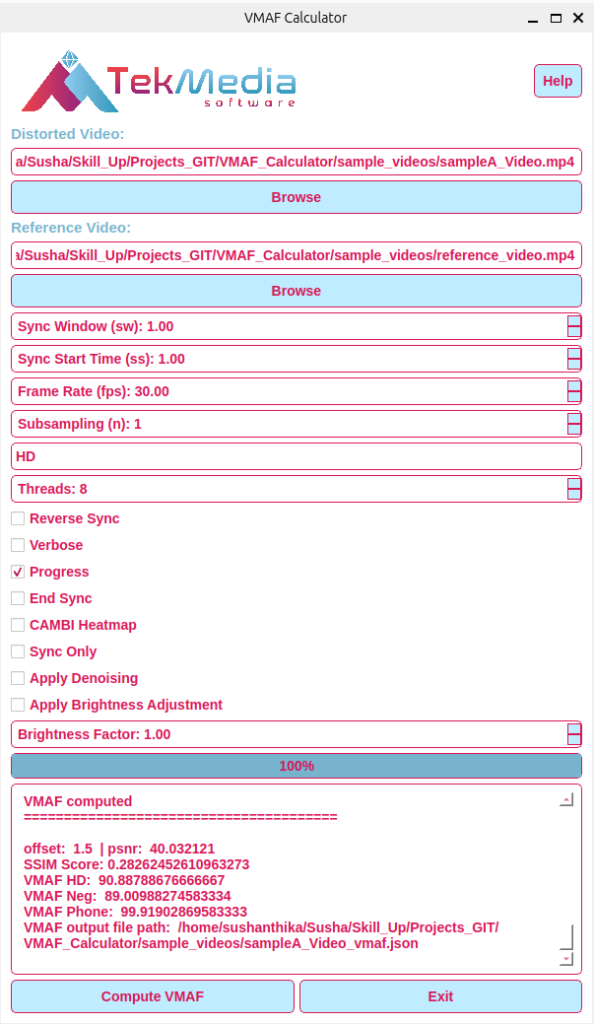
VMAF Calculation and Result Display: Once the VMAF score is calculated, it will be displayed on the GUI. This part of the project helps users understand the perceived quality of the compressed video compared to the original one. Refer video qualities here.
Understanding the Workflow
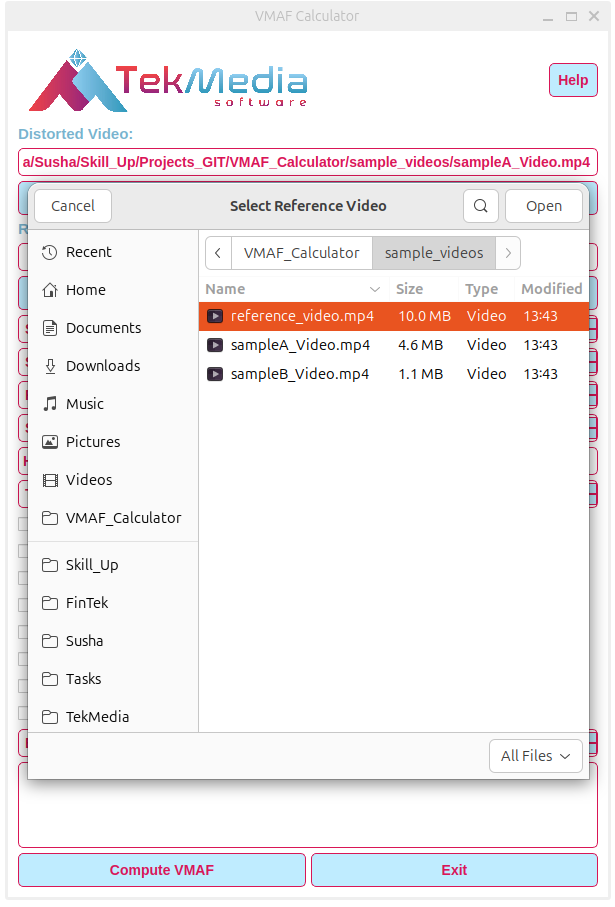
User Input via GUI: The user selects the reference video and the distorted video using a simple file selection dialog in the PyQt interface.
Video Preprocessing with FFmpeg: To ensure that both videos are compatible for comparison, the backend uses FFmpeg to resize and align the video properties. This ensures that differences are due to video quality and not resolution or format mismatches.
VMAF Computation: With the preprocessed videos ready, the Python backend calls the VMAF library, feeding it the reference and distorted videos. VMAF processes the frames and calculates a score for each frame, which is then averaged to give a final score.
Displaying the Results: The computed VMAF score is displayed on the PyQt interface, allowing users to understand how closely the quality of the distorted video matches the original.
Tools and Technologies Used
Python: Core language for the backend calculations.
PyQt5: For creating the GUI (Graphical User Interface).
FFmpeg: A tool for video processing, used here for denoising, brightness adjustments, and format conversions.
OpenCV: To calculate metrics like SSIM (Structural Similarity Index).
scikit-image: To compute SSIM for comparing video frames.
Step 1: Setting Up the Front-End with PyQt5
Our front-end is built using PyQt5, a Python binding for the Qt framework, which helps create the graphical interface where users can select videos and set parameters.
Key Features of the Front-End
File Selection: Browse and select distorted and reference videos.
Parameter Input: Set sync windows, frame rates, and other calculation options.
Checkboxes and Options: Choose advanced options like reverse sync, verbose logging, denoising, and brightness adjustment.
Compute Button: Triggers the backend script to compute VMAF.
Output Display: Shows the calculation progress and results.
Code Snippet for the Front-End
class VMAFApp(QWidget):
    def __init__(self):
        super().__init__()
        self.initUI()
        self.process = QProcess(self)
        self.process.readyReadStandardOutput.connect(self.handle_stdout)
        self.process.readyReadStandardError.connect(self.handle_stderr)
        self.process.finished.connect(self.process_finished)
The initUI method sets up the layout and widgets like QPushButton, QLineEdit, QComboBox, and others for user interactions.
Step 2: Creating the Backend Logic
The backend script is where the real computation happens. It reads input videos, applies any necessary preprocessing like denoising, scaling, or brightness adjustment to ensure that the video is in the optimal condition for analysis. This step can be crucial for removing noise or adjusting video properties that might otherwise skew the VMAF score. The script then uses the FFmpeg tool to handle video format conversions and frame-by-frame analysis.
After preprocessing, the script calculates VMAF using models such as HD (for 1080p resolution) or 4K, which are specifically tuned for different video resolutions to provide accurate quality assessments.
Key Functionalities in the Backend
Argument Parsing: Uses argparse to accept command-line arguments for video paths and options.
Video Processing: Uses ffmpeg for denoising, brightness adjustment, and syncing video frames.
VMAF Calculation: Uses the VMAF library to compute scores and outputs the results in JSON or XML.
SSIM Calculation: Uses OpenCV and scikit-image to calculate SSIM, which provides another perspective on video quality.
Example Code for Video Denoising
def denoise_video(input_video_path, output_video_path):
    command = [
        'ffmpeg',
        '-i', input_video_path,
        '-vf', 'hqdn3d',
        '-c:a', 'copy',
        output_video_path
    ]
    subprocess.run(command, check=True)
This method uses ffmpeg to apply a high-quality denoising filter to the input video, saving the result to a specified path.
Step 3: Combining Front-End and Backend
When the "Compute VMAF" button is clicked in the PyQt5 application, it triggers the compute_vmaf method, which serves as the bridge between the user interface and the backend processing. This method constructs a command based on the user's input—such as the paths of the reference and distorted videos, selected VMAF model, and any other analysis parameters. The command is designed to run the backend script with these parameters, ensuring that the right settings are used for the VMAF computation.
To execute this command, the method uses QProcess, a PyQt5 class that enables interaction with external processes directly from the GUI. QProcess allows the application to run the backend script asynchronously, meaning the GUI remains responsive while the VMAF calculations are performed in the background.
Code Snippet for the Compute Button
def compute_vmaf(self):
    cmd = [
        'python3', 'Vmaf_calculator.py',
        '-d', self.distorted_input.text(),
        '-r', self.reference_input.text(),
        '-model', self.model_input.currentText(),
    ]

    # Add flags and parameters
    if self.denoise_checkbox.isChecked():
        cmd.append('-denoise')
    if self.brightness_checkbox.isChecked():
        cmd.append('-brightness')
        cmd.append(str(self.brightness_input.value()))
    # Start the backend process
    self.process.start(' '.join(cmd))
This method assembles the necessary command-line arguments based on the user's input, triggering the backend VMAF calculation and handling the output.
Step 4: Handling Output and Displaying Results
The VMAF calculation can be resource-intensive and time-consuming, so providing feedback to the user is important. We update a QProgressBar and display the standard output from the backend in a QTextEdit widget.
Example of Handling Progress Updates
def handle_stdout(self):
    data = self.process.readAllStandardOutput().data().decode()
    self.output_display.append(data)
    if "progress" in data:
        try:
            progress_value = int(data.split("progress = ")[1].strip().split("%")[0])
            self.progress_bar.setValue(progress_value)
        except (IndexError, ValueError):
            pass
This function reads the output from the backend and updates the progress bar accordingly, giving users real-time feedback during the VMAF computation.
Step 5: Running the Application
With the front-end and backend ready, you can run the PyQt5 application. Simply execute the script:
python3 vmaf_app.py
After starting the app, users can select their videos, adjust parameters, and click "Compute VMAF" to see the results.
Step 6: Interpreting the Results
The results include the VMAF score, SSIM score, and optionally a CAMBI heatmap for a more in-depth video analysis. The output is saved as a JSON or XML file and displayed in the interface.
Example of JSON Output
{
    "frames": [
        {
            "metrics": {
                "VMAF_score": 92.3,
                "SSIM": 0.98
            }
        },
        ...
    ]
}
This JSON output provides frame-by-frame metrics, detailing the VMAF score for each frame in the video sequence. These metrics can be extremely valuable for understanding how the video quality fluctuates over time. For example, you can identify specific moments where the quality drops due to compression artifacts or motion-related distortions, helping to pinpoint problem areas in the video stream.
The Video Quality Metrics Used:
1. VMAF (Video Multi-method Assessment Fusion)
- VMAF is a perceptual video quality metric developed by Netflix, which combines multiple quality metrics (e.g., PSNR, SSIM) into a single score that correlates better with human visual perception.
2. PSNR (Peak Signal-to-Noise Ratio)
- PSNR measures the peak error between two images or videos, with a higher value indicating better quality. It is often used to assess compression quality.
3. SSIM (Structural Similarity Index)
- SSIM compares the structural similarity between two images or video frames, taking into account luminance, contrast, and texture. It aims to model the perceived visual quality more closely.
Benefits of this Project
Practical Learning: This project gives hands-on experience with Python, PyQt, and FFmpeg, while offering insights into video quality metrics.
Customizability: You can extend the interface to support batch video analysis or include other video quality metrics like PSNR and SSIM.
Real-World Application: For video streaming or editing projects, integrating a tool like this can help in maintaining high-quality standards for video content.
User Interface: A Closer Look at the VMAF Calculator UI


Conclusion
By combining these components, you’ve gained hands-on experience in video quality analysis and software development, empowering you to assess and optimize video compressions, encoding settings, and maintain high-quality content. More information on VMAF can be found here, while detailed explanations of PSNR and SSIM can be found on their respective Wikipedia pages here and here.
This expertise can be applied to a wide range of video processing tasks, making it a valuable asset for professionals in video streaming, media production, or software development.

